
February 13, 2013
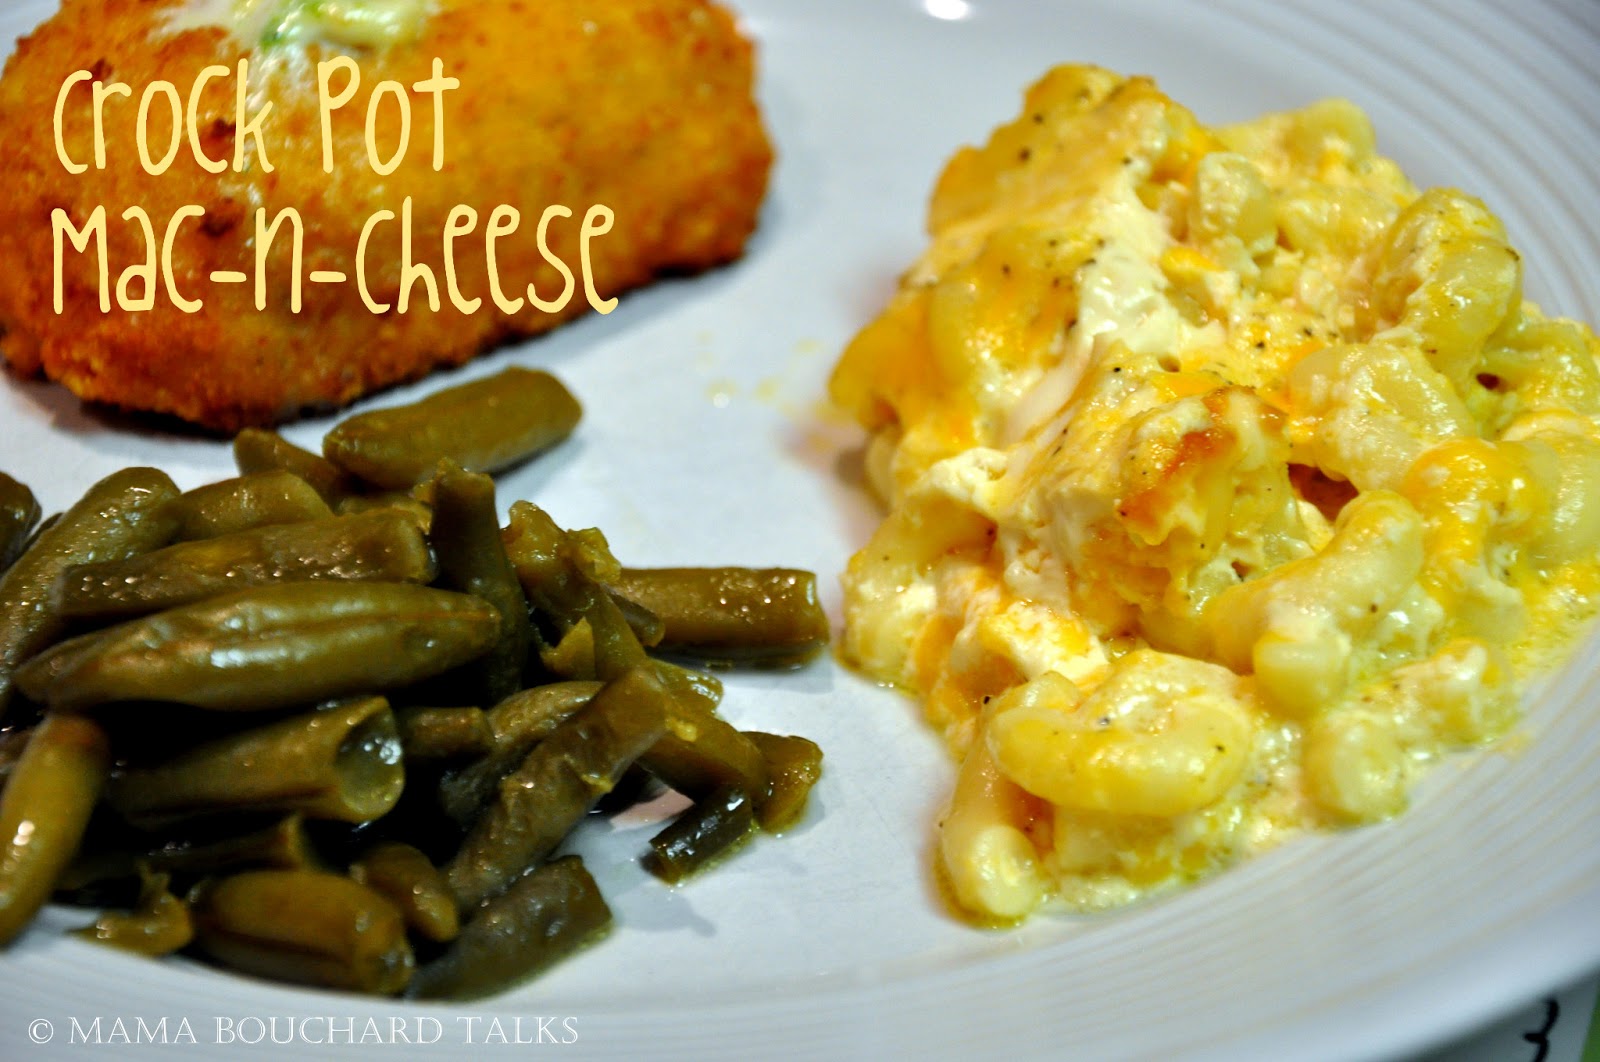
 One of my second mamas sent me this recipe. She didn't tell me not to tell, so here it is. You will never turn back after having it this way. Your kids will thank you. Your husband will thank you. Click here and enjoy!
January 29, 2013
 You don't want to miss this one. A fast and easy preparation will leave you wanting more...and it got 6 thumbs up from my kids!
Click here for the full recipe.
November 29, 2012
January 29, 2013

Click here for the full recipe.
November 29, 2012

Creamy Chicken Divan Soup
This one is fast, easy, and delicious! A rotisserie chicken makes prep time a breeze.

Oh... and a fun apple art project too!
Crock Pot Roast with A Twist...and A "Side"

Saturday - July 30, 2011

Buffalo Chicken Wings
Recipe from Southern LivingNot that us women are ever in the doghouse, but if you should find yourself there these will definitely "dig" you out! I came across this recipe several years ago because I L.O.V.E chicken wings and Man loves meat, and wings too! So, since I lived in the tiniest town you can imagine and my favorite chicken wings of ALL time are located in N.C., no where close to where I lived, I decided to give these a whirl. I hope you will too. They are a sure hit with the men in your life and kids too.
Ingredients:
**Let me say that I frequently cut this recipe in half.**
6 pounds chicken wings
(2 (3-pound) packages frozen party-style wings, thawed, may be substituted)
4 (0.7 ounce) envelopes Italian salad dressing mix, divided
1 cup butter, melted
1 to 1.5 cups hot sauce
1/4 cup lemon juice
1 teaspoon dried basil
Ranch or Blue Cheese Dressin' for Dippin'
Directions:
- Cut off wingtips, and discard; cut chicken wings in half at joint, if desired. (You can purchase them already cut apart too.)
- Place 1 package Italian salad dressing mix in large zip-top plastic bag; add half wings, and shake to coat.
- Arrange coated wings in a single layer on an aluminum foil-lined baking sheet. (I even spray the foil.)
- Repeat procedure with other half of wings.

- Bake at 425 degrees for 35 minutes or until browned. Remove pans from oven, REDUCE heat to 350 degrees.
- Stir together remaining two packages Italian salad dressing mix, butter, and next three ingredients in a large bowl.
- Add wings and toss until evenly coated.

- Return wings to foil-lined pan(s) and bake at 350 degrees for 30 more minutes.
- Serve with your choice of dressing.
If these don't get you out of the dog house, you done somethin' real bad. :)
Thursday - May 26, 2011

Sweet & Sticky Orange Chicken
Recipe from Kraft Food & Family With the little time that most of us have to prepare dinner, I am always on the lookout for quick, delicious, and healthy meals for my family. I have a subscription to Kraft Food and Family magazine and can't wait to look through their newest creations when it comes. It is an inexpensive find and I suggest you get one too! You will not be sorry!
Olivia's newest food passion is Chinese. She would eat at the buffet daily if we would take her. However, our waistlines and pocketbooks could never stand this! So, when I came across Kraft's orange chicken recipe I had to try it. And, I am so glad I did. It was a hit! And, I love how they state total time invested is 29 minutes. What a hoot! But hey, if they say so....
Ingredients:
1 large navel orange
1/4 cup Kraft Asian Toasted Sesame Dressing
2 Tbsp. lite soy sauce (there was nothin' lite about mine)
2 Tbsp. sugar
1/2 tsp. crushed red pepper
(I held this and added at the table..the kids can't take it!)
1 lb. boneless skinless chicken thighs, cut into bite-size pieces
(I suggest any boneless you can find. I could not find boneless and bought bone-in thighs...what a pain. Breasts would have worked fine.)
1 Tbsp. minced gingerroot
(I used some ginger spice I had.)
1 clove garlic, minced
1 large red pepper, cut into bite size pieces
Directions:
1.) Grate 1 tsp. zest from orange. Use small sharp knife to cut remaining peel and white pith from orange; cut orange into bite size pieces. Mix zest, dressing, soy sauce, sugar and crushed red pepper (if your family can take the heat...if not, hold until the table).


3.) Add dressing mixture to skillet; cook and stir 1 to 2 min. or until thickened, stirring constantly. Add chicken mixture, cook and stir 2 min. or until heated through. Stir in oranges; spoon onto plates.
**Kid Warning--They were a little "freaked" out that the oranges were slightly warm, but they were delicious! And hey, it is all about new experiences. Kids need to be prepared to eat at any table. Ok, I will get off my soapbox now. Happy Cooking!**
-----------------------------------------------------------------------------------------------------------------------
Thursday - May 19, 2011

Recipe from Southern Living - with my own twist
I have to start with a shout-out to my Man because I told him how you people were probably starving by now because I have not posted a recipe in like three
The most common
Ingredients:
1 (20 oz.) package refrigerated/frozen four cheese ravioli (This really can be whatever pasta floats your boat!)
1 (16 oz.) jar sun-dried tomato Alfredo sauce
2 Tbsp. white wine (I always use the little bottle of cooking wine because I don't "do" wine.)
2 medium-size fresh tomatoes, chopped
1/2 cup chopped fresh basil (puhlease...sorry but I am not paying that and using that little bit...mine comes out of the dry spice bottle...just shake a little in)
1/3 cup grated Parmesan cheese
1/2 lb. hamburger, cooked (I add this because remember I am married to Man? He is like, "Where's the beef?" I must admit it really does make it awesome...feel free to use a pound.)
Directions:
1. Chop up the tomatoes and set aside....or do them the night before.

2.) Get the water boiling for the pasta while you cut.
3.) Get another pot heating up with the Alfredo sauce. Pour the entire jar in the pan. Take the 2 tablespoons of wine and put it in the Alfredo jar. Shake the jar and pour the contents into the sauce. Add the tomatoes and basil. Cook on medium to low heat.


So there you have it. The next time you
P.S. Don't forget to thank Man for his sacrifice to bring this to you. Because, once he volunteered I gave him a list of errands to do with Addison while they waited on Olivia. Now that part, yes, was "voluntold". :)
-----------------------------------------------------------------------------------------------------------------------
Tuesday - April 26, 2011

Cheesy Mashed Potatoes
Recipe from the kitchen of Marcia Parsons-AKA my cousin :)Our last Thanksgiving was our first major holiday, in my life, where my grandmother (my father's mother) was not with us. She has always held the major meals at her home until a few years ago when my grandfather fell ill and it became too much for her to do. Let's face it, cooking for 20+ people is not an easy task. But, she was still at the holiday meals, presiding over, if you know what I mean. It really never felt the same...actually very sad to me because I am 32 years old and I never really knew her to even eat from another person's table. I know she did but she was usually the one feeding people. Trust me, no one minded this because she could cook! Anyway, two of my cousins decided to cook up Thanksgiving for our family. We all got to bring something to contribute but they really took care of the bulk of it. I must say that I was a little worried because I thought it would feel very weird to be at a holiday meal 1.) without my grandmother and 2.) what if some of her famous dishes didn't make the cut? I don't like change people and this was a BIG one!
Well, I must tell you that that meal and gathering will remain very dear to me forever. It felt like the effort my grandmother put in for years really resonated for everyone...it wasn't about the food it was all about the company. We all had a blast and it was so good to stand back and see all of us there and thinking of how proud she would be to see her family honoring a tradition of family gathering that was so important to her.
 |
| That is our cousin Emerson! They were excited to be together! |
Ingredients:
8-10 medium-size baking potatoes, peeled and cut into chunks
6 tablespoons unsalted butter, softened (I used margarine)
3/4 cup freshly grated Parmesan cheese (mine came from the can)
1 cup sour cream
1 8oz. package cream cheese, softened
1/3 cup chopped fresh chives (optional)
Salt and Pepper to taste
Directions:
1. Boil the potatoes in salted water until tender and drain.
2. Rub a 3 quart souffle or 13 x 9 inch baking dish with 2 tablespoons of butter. Sprinkle the bottom of the dish with 1/4 cup of the Parmesan cheese, making sure it is evenly distributed.
3. Put the potatoes in a large bowl. Add the sour cream, cream cheese, 2 tablespoons of the remaining butter, 1/4 cup of the remaining Parmesan, the chives (if using), and season with salt and pepper.
4. Using an electric mixer, beat the potatoes until smooth and transfer to the prepared dish. Dot with remaining 2 tablespoons of butter. Sprinkle with remaining 1/4 cup of Parmesan cheese.
5. At this point you can cover and refrigerate for 2-3 days or freeze for one month. Bring to room temperature before continuing.
6. Preheat oven to 350 degrees. Bake, uncovered, until golden, about 25 minutes.
P.S. I cut this in half for our Easter dinner...and it was just right! Ok, not literally (from the picture you see)..I just forgot to take the picture until it was too late :)
-----------------------------------------------------------------------------------------------------
Sunday - April 24, 2011

Cranberry Apple Casserole
Recipe from the kitchen of Sallye - AKA my mom :)Enjoy the warmth that this apple crisp sends through your body on your first bite. I am sure somebody dreamed up this wonderful delicacy thinking of cool Fall nights, but you will see why it has to be used throughout the year. And hey...I think you can count it as at least one serving of fruit for the day...and maybe a dairy if you add the ice cream?? Whatever makes you feel better!
Ingredients:
3 Large Red Delicious Apples (unpeeled)
1 (16 oz.) can Whole Cranberry Sauce
1 Cup Brown Sugar
1 Cup Uncooked Oatmeal
1/3 Cup Flour
1 Stick Butter
Directions:
Preheat Oven to 350 degrees. Grease 13 x 9 baking dish and set aside.
1.) Slice apples and place in dish.
** Slice the apple into medium slices, not too thick.
2.) Spoon cranberry sauce over apples.


Sprinkle over apples.


or you can go to bed really guilty...
 YES...that is caramel!
BON APPETIT!
-----------------------------------------------------------------------------------------------------
Saturday - April 16, 2011


BON APPETIT!
-----------------------------------------------------------------------------------------------------
Saturday - April 16, 2011

Sweet Potato Casserole
Recipe from the home of Sallye...AKA my mom :)
I hate to admit that there is no real great story behind this recipe, just some great ingredients. I can say that I am pretty sure it is meant for those traditional holidays like Thanksgiving, Christmas, even Easter (wink, wink) but once you eat this you will understand why I cook it at least once a month in my home. I can also suggest that if you are cooking for a large crowd you might choose to do what my cousin Linda did at Thanksgiving and put it in a 9x13 pan, which would require you to double or triple this recipe. I guess I should have asked her before I posted this, but I have confidence you can figure it out. And trust me, you won't mind if there are leftovers!
P.S. So sorry that the above picture is not the "after its cooked photo", but we got a little too anxious about eating it ;) The only difference is the topping will be darker and melted.
P.P.S. You don't need to be a fan of sweet potatoes to fall in love with this dessert vegetable! Trust me...
Ingredients for Casserole
1 Large Can Sweet Potatoes
3/4 Cup Sugar
1/2 Teaspoon Salt
1/3 Stick Margarine (Softened)
1/4 Cup Milk
1 Teaspoon Vanilla
2 Eggs, Beaten
Ingredients for Crunchy Topping
1 Cup Brown Sugar
1/3 Cup Flour
1/3 Stick Margarine, Melted
1 Cup Chopped Pecans
Directions
Preheat oven to 350 degrees. Drain sweet potatoes and pour into large mixing bowl. Use fork to mash the potatoes leaving no chunks. Fold in remaining ingredients for casserole. Pour into an 8x8 (or something close to this). In a smaller bowl mix the ingredients for the Crunchy Topping and crumble over the casserole. Bake for 35 minutes.

Here are the two mixes before the crumble goes on top.
-----------------------------------------------------------------------------------------------------
Saturday - March 26, 2011

Ingredients/Directions:
1 Box Cake Mix (Yellow)
3/4 Vegetable Oil
1 Cup Buttermilk
4 Eggs
1/2 Cup Sugar
Mix together and swirl in the following dry ingredients.
1/2 Cup Nuts ( I use pecans.)
1/2 Cup Raisins
1 Cup Brown Sugar
3 Teaspoons Cinnamon
Bake at 300 degrees 1 hour or less.
I suggest checking it about 45 minutes..all ovens vary.
Glaze:
1 Cup Powdered Sugar
1/2 Teaspoon Vanilla
Evaporated Milk
(Slowly pour in the milk until desired drizzle consistency. A small can will be more then enough. It really doesn't take too much.)
Pour the glaze over the hot cake and don't feel guilty!
Or feel a little guilt by punching holes with your toothpick in the cake and letting the glaze ooze into the holes!
**When I want to take this to a morning function I mix all of the dry ingredients the night before so I can pop it in the oven quickly without a lot of work.**
-----------------------------------------------------------------------------------------------------
Sunday - February 13, 2011

Saturday - March 26, 2011

Honey Bun Cake
Recipe from the kitchen of Lavada Markland
Well let me just say that I have not come close to forgetting about posting about food and had no idea it had been this long. I have been taking pictures of all kinds of goodies but clearly they are keeping warm in their cute little file over in the picture section of this computer. So sorry and here we go...
I don't know about you but every year starting at Thanksgiving I promise myself I am not going to overdo it, I will be good, and will watch everything I eat. Apparently I fully adhere to this and watch it all go in my mouth. But, let me just blame say that when it comes to my mom's house and the dessert department...TROUBLE...is the only word that comes to mind. Every year, on top of what she bakes, all these wonderful people she works with give her treats to take home. Um, there is one major flaw with this plan....she is the only person in our home that has self-control about these things. I might just be next in line but only on my best days. I live for sweets...that is the Taylor in me for sure. Anyway, a couple of years ago as I was trying to lose weight from baby #2...and I was living with her in transition from SC to TX. Oh no....
She waltzs in one evening with armloads of goodies and lays them across the counter. There it is, calling my name, but what is it? IT is a Honey Bun Cake...that is right...Honey Bun. Not like we grew up with...those delicacies in the convenient store with plastic wrapping. Oh no, this is divine sweetness meant for every meal but great as breakfast. I decide to have a little bite and had no shame going back for more and you won't either. Enjoy!
Ingredients/Directions:
1 Box Cake Mix (Yellow)
3/4 Vegetable Oil
1 Cup Buttermilk
4 Eggs
1/2 Cup Sugar
Mix together and swirl in the following dry ingredients.
1/2 Cup Nuts ( I use pecans.)
1/2 Cup Raisins
1 Cup Brown Sugar
3 Teaspoons Cinnamon
Bake at 300 degrees 1 hour or less.
I suggest checking it about 45 minutes..all ovens vary.
Glaze:
1 Cup Powdered Sugar
1/2 Teaspoon Vanilla
Evaporated Milk
(Slowly pour in the milk until desired drizzle consistency. A small can will be more then enough. It really doesn't take too much.)
Pour the glaze over the hot cake and don't feel guilty!
Or feel a little guilt by punching holes with your toothpick in the cake and letting the glaze ooze into the holes!
**When I want to take this to a morning function I mix all of the dry ingredients the night before so I can pop it in the oven quickly without a lot of work.**
-----------------------------------------------------------------------------------------------------
Sunday - February 13, 2011

Valentine Whoopie Pies
Recipe from Family Fun magazine
It seems a little odd to me that I have not posted a dessert yet since I would like to think that sugar is a major food group. My best Cowgirl, Chondra, and I bought two of these delicacies while on a day trip to Dallas for some shopping. Let’s just say we are great friends for a reason. Ladies, if you find a girlfriend that agrees that maybe dessert just ought to come before the meal most times, keep her! Well, that is if you think sugar should be a major food group like me.
Anyway, we planned a baking day at her house to make loads of Christmas goodies. We didn’t exactly plan the loads part, but let’s just say it took ALL day. On her list, whoopie pies. She had been dreaming of them since Dallas because that is just what we women do! Then, about a month ago she sent me an email with the subject Making Whoopie. Well….. Ok, ok, so I opened it and she is sending me the tips and tricks of whoopie pies. Oh my goodness. She is smearing the pounds on me through the internet. Cowgirl doesn’t have to worry so much about the pounds you see, she chases cows, boys, and dogs all day. Back off men, she is married…it is a 5 and 2 year old she chases. Sorry.
Back on track…then I open up my
“saving you through the snow storm book”, Family Fun, and there is a recipe for Valentine Whoopie Pies. This has to be a sign. I must NEED to make these. So, for my sweeties on Valentines, I caved, kicking and screaming and made whoopie pies. And where is Cowgirl who is supposed to take half of these and eat them? New York City eating sushi! I guess you can take the cowgirl out of the country after all.
Ingredients:
For the cakes:
2 cups flour
1/2 cup unsweetened cocoa powder
1 teaspoon baking soda
1/2 teaspoon salt
1 cup buttermilk
1 teaspoon vanilla extract
1/2 cup softened butter (I used margarine and it was fine.)
1 cup sugar
1 egg
For the filling:
1/2 cup softened butter (I used margarine and it was fine.)
1 1/2 cups confectioner's sugar
1 cup marshmallow creme
1 teaspoon vanilla
Red food coloring (optional--this way they can be St. Patrick's whoopie pies too!)
Directions:
- Heat the oven to 35o degrees. Line two baking sheets with parchment paper.
- In a medium bowl, whisk together the flour, cocoa powder, baking soda, and salt. In a glass measuring cup or small bowl, stir together the buttermilk and vanilla extract.
- In a large bowl with a hand mixer set at medium speed, beat the butter and sugar until evenly blended, about 1-2 minutes. Add the egg, increase the speed to high, and beat until smooth and creamy, about 1 minute more.
- Pour half the flour mixture into the butter-sugar mixture, and beat at medium speed until combined. Add the buttermilk mixture and continue beating until just blended. Add the remaining flour mixture and beat again.
- Use a cookie scoop or spoon to place a heaping tablespoon of batter on a prepared cookie sheet. Add more mounds of batter, evenly spacing them, until there are nine on each sheet. Slightly flatten each mound with a spoon.
- Bake the cakes one sheet at a time for 10 minutes (they should be moist and spongy). Let them cool on the sheet for 2 minutes, then carefully transfer them to a rack to cool completely. Reline the sheets and scoop, shape, and bake the remaining batter.
- Using an electric mixer at medium-high speed, beat all of the filling ingredients except the food coloring in a medium bowl until evenly blended, about 2 minutes. If you want to use the food coloring, fold in drops of desired color now.
- To make each pie, spoon and spread a heaping tablespoon of the filling onto the bottom of a cake, then gently press another cake on top.
----------------------------------------------------------------------------------------------------
Wednesday - February, 2, 2011

Skillet Breakfast
Recipe from the Home of Grammie Armstrong
So we are snowed in this week and I love it! I panicked like everyone else and ran to Walmart to pick up a "few" items to survive. I had already planned on making this dish with sausage even though it called for bacon, but I was at Walmart so I got the bacon. So there ya go and here we go!
A camping we did go this past summer. I married a MAN from Vermont! I say MAN because he is one of those guys that did not go the Boy Scouts because this is how they just lived. You get me? Well, I forged this great idea that I would volunteer to go camping. He was so excited, and the glimmer only faded slightly when I told him it would be in a camper with A/C. People we live in Texas...if you would volunteer to sleep in a tent with two young kids, bugs the size of Texas, and no A/C or "amenities" then you are a better wife then me. So he scheduled the camper...

I thought we shouldn't go to far from home because...ok, ok, I was terrified, but it was not showing on the outside. First things first, what was I going to cook? We all know why I cook and here was a cooking adventure if I ever did see one. So, I called up my mom because who else would know better. Oh right, we never EVER went camping. She gave me a referral to her mom, Grammie. Apparently back in the day when they went to cattle shows, they camped. So I called Grammie with plenty of notice and told her the deal. Like it was yesterday, she started rattling off detailed recipes that only needed one pot, skillet, etc. I don't cook from my head...remember? So, I asked her to send me the recipes in the mail. She did. On cute little Rooster recipe cards. Because that is what Grammies do. Oh, and there was a recipe for each meal of the day...so we wouldn't starve. Of course. Anyway, I buy everything we need, spend hours (yes HOURS) cleaning that camper that came to me "clean" and late, and we were off. Only 30 minutes down the road, but we were off! There is not enough hours in the day to really describe what a wonderful experience this was for our family.

So, I can't remember what item I did not have for a meal...it was an essential though so we loaded up, after I took stock of the inventory, and headed back into town. See, I was looking pretty smart right now. Essentials in hand, we were back camping. The following morning...duh, duh, duh, I don't (again) have the essentials for the Skillet Breakfast. What was I going to tell Grammie. Of course she was going to want to know how her "dishes" turned out. And here I had messed up 2 of them! This is where I plan to blame it on the I have two kids brain :) Anyway, I realized I had all of the ingredients for this the other night, except bacon, which of course I was going to substitute sausage until the weather man informed me that I would be home for several days straight with four mouths to feed around the clock. Picked up the bacon at Walmart and rocked my family's socks off with this breakfast for dinner!
Ingredients:
6 Slices Chunked Country Bacon (A.K.A Thick Bacon Cut Up)
**I used half the package because I live with MAN! And we fried it whole and then chunked it.**
4 Large Potatoes Chunked (A.K.A Cubed)
**I used 5 Medium to Small
1 Small Can Green Chilies (Drained)
5 Large Eggs Beaten
Directions:
Fry Bacon in the Skillet. Remove from skillet and add potatoes. Cook until tender. (Don't go too fast, they will burn on the outside and be raw on the inside.) Add eggs, chilies, and bacon. Salt and pepper to taste.
**I chose to push the potatoes to the side and do the eggs on the empty side and then add the bacon. Due to the small babes I left the chilies out and added to the top after plating.
P.S. I really recommend the camping...

Saturday - January 22, 2011

Sweet Cornbread
Recipe from the Home of Grammie Armstrong
Ok, so if you know me and have spent any time at my table you have wrapped your lips around this deliciousness known as sweet cornbread. I have not had one person ever eat this and not ask for the recipe. It seriously could be a meal by itself, but make sure you sit down to devour this with your favorite tub of butter. I did mention I am from the South right? We put butter on everything!
Ingredients:
1.5 cups of Self-Rising Cornmeal (color doesn't matter...I like white)
1.5 cups of All-Purpose Flour
1/2 cup of Sugar
1/2 cup of Vegetable Oil
1.5 cups of Buttermilk
1 tsp. of Dry Yeast (found in the baking aisle in the form of packets or a small jar)
Directions:
This is soooo easy, here we go!
Turn your oven to 350 degrees. Mix all ingredients together. Grease baking pan (oil or Pam). Pour in your mix. Bake for 1 hour. Do the toothpick test...because that is just how we test stuff in the South!
**Toothpick Test- Stick in the toothpick and if doesn't come out clean...your stuff isn't done.**
No comments:
Post a Comment